Feature Spotlight: Prospect Management
As part of our September release, we introduced brand new capabilities to our existing prospect management functions. With these new features, we’ve made it easier to manage and monitor your prospects and better see your full pipeline.
Below, we’ve listed just a few of the newest capabilities available to you through our latest release.
The New Prospect Creation Capabilities
Improving the way prospects are created and managed is important for having accurate snapshot data and tracking pipeline performance overtime. With these new capabilities, you can create, monitor and progress your prospect records. You’ll also be able to track new leads, interaction activities, assigned tasks, open processes, and then ultimately, welcome them as a new client.
Create a Prospect Wizard
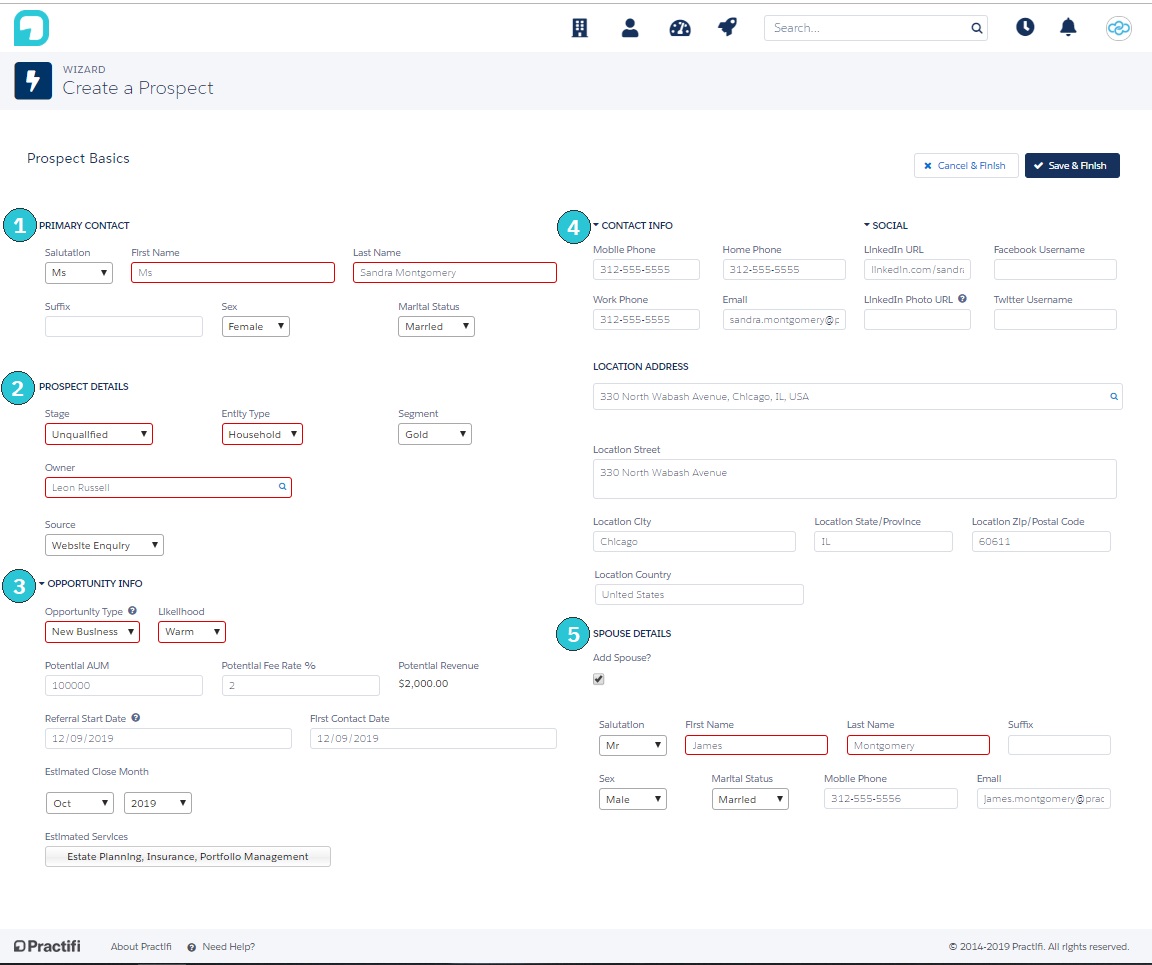
Accessible in the Launcher menu, this new wizard is one of the easiest ways to add new prospects. To create a comprehensive Prospect record, we suggest a few pieces of information, such as (1) Primary Contact, (2) Prospect Details, (3) Opportunity Information, (4) Contact Information, and (5) Spouse Details, if relevant.
You can also configure these field options to ensure you’re getting the most meaningful data for your business.
Prospect 360 Page
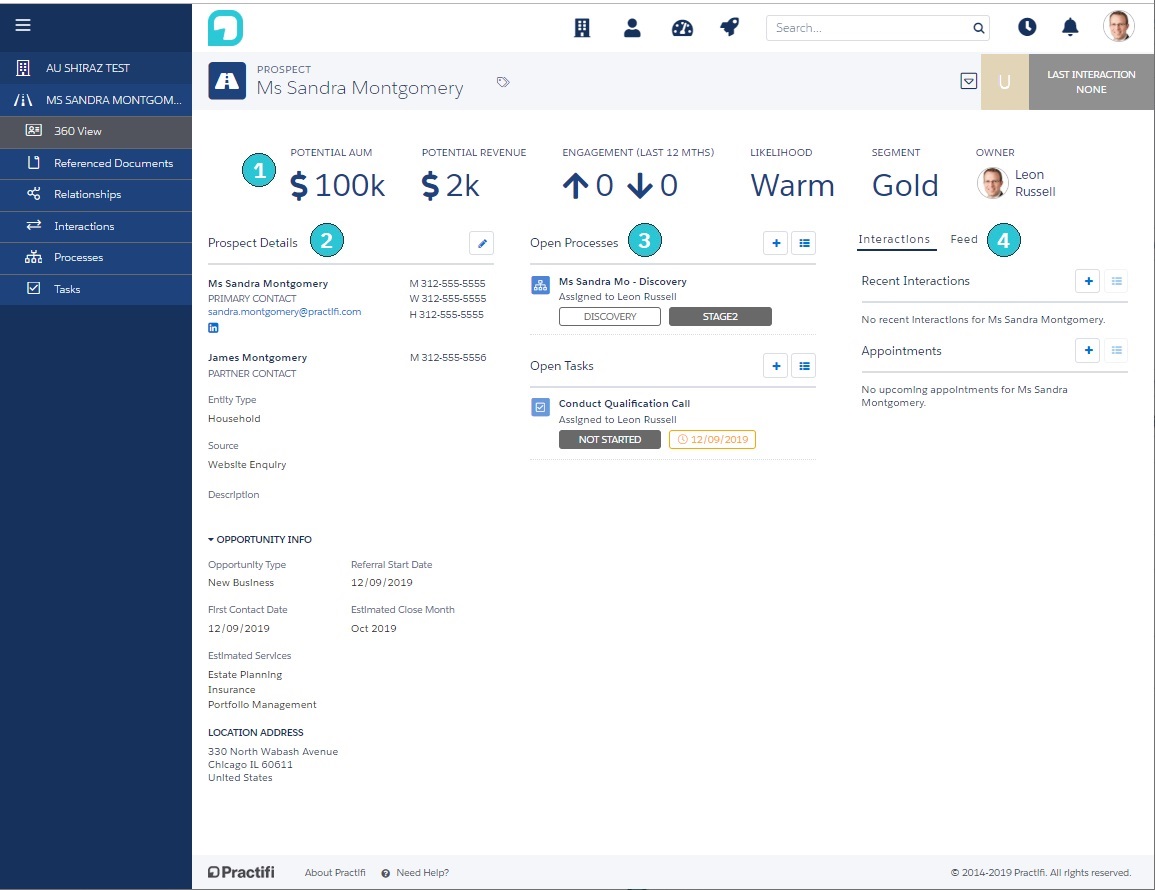
Once you’ve created a new prospect record, you’ll be taken to the Prospect 360 view page. This page is the default landing page where you can view a prospect’s key information.
- Prospect Highlights shows all the key performance indicators relevant to the prospect.
- Prospect Details show all the details you captured in the ‘Create a Prospect’ wizard. You can edit these directly in this page to keep your record up to date.
- Open Processes and Open Tasks display all the related workflows and processes your practice uses for prospect automation. This way, you can quickly see the progress.
- Interactions, Feed and Appointments provide oversight into the completed sales activities and and helps you ensure the prospect moves through the sales cycle successfully.
‘Promote to Client’ Button
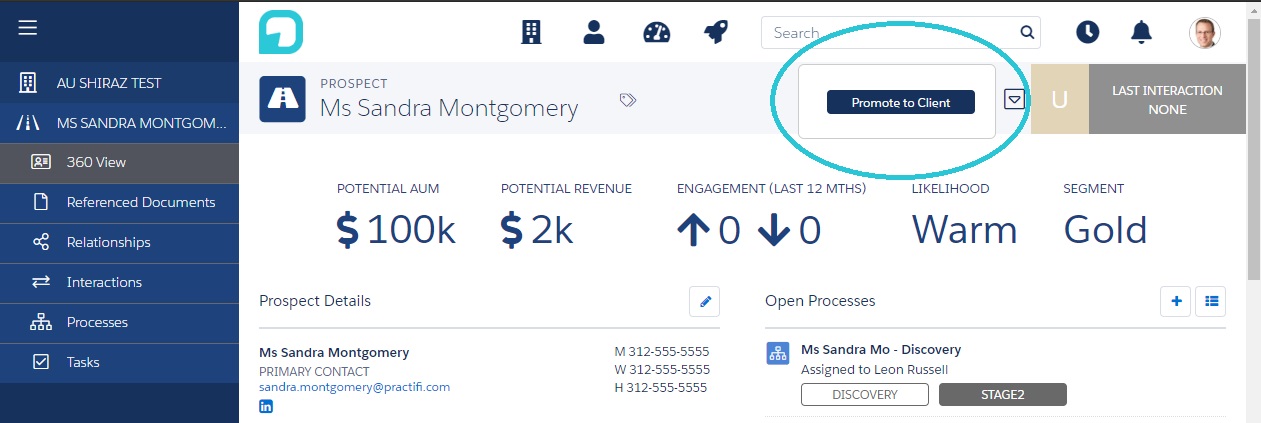
When it’s time to change your prospect to a client, click the dropdown menu on the Prospect 360 page and select ‘Promote to Client’. After you click this button, your prospect will convert into respective client, person and service records.
Once completed, you’ll be taken to the Client 360 page with all the same record information ready for you and your team to use.
New Prospect Monitoring Capabilities
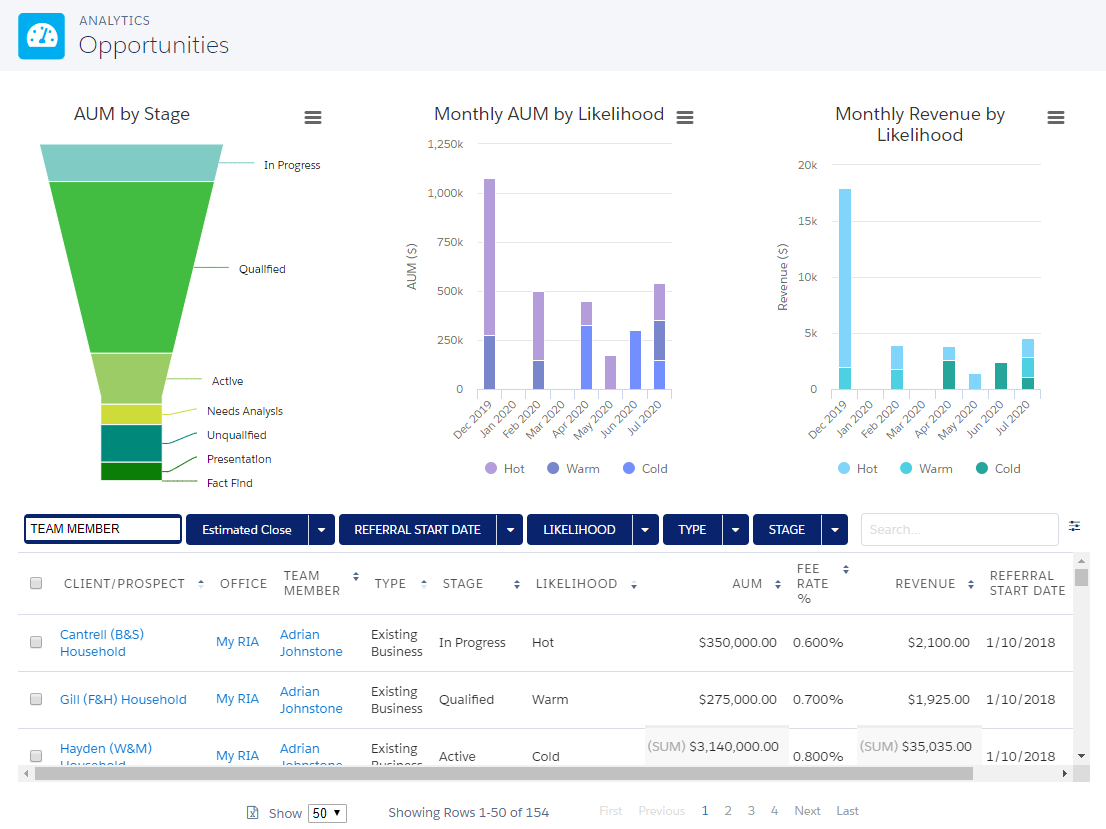
In addition to the new creation capabilities, we’ve also provided a few new features to help you get insight into your prospecting metrics and performance as a whole. These features will help you forecast revenue and futher manage your pipeline to drive business growth.
At a Glance Prospect Tiles
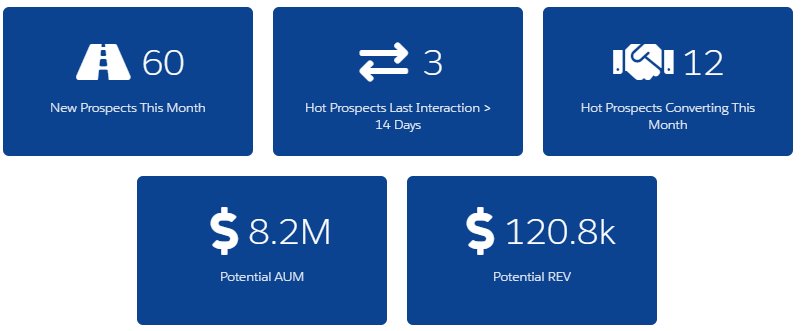
If you’re already using the ‘At a Glance’ feature within Practifi, you’ll now be able to see these tiles in the prospects row. These tiles summarize critical information to help you understand the size and value of your pipeline. They also highlight prospects that require further engagement. We’ve created a few helpful tiles to get you started. However, you can configure these to fit your unique business needs.
Opportunity Analytics Page
